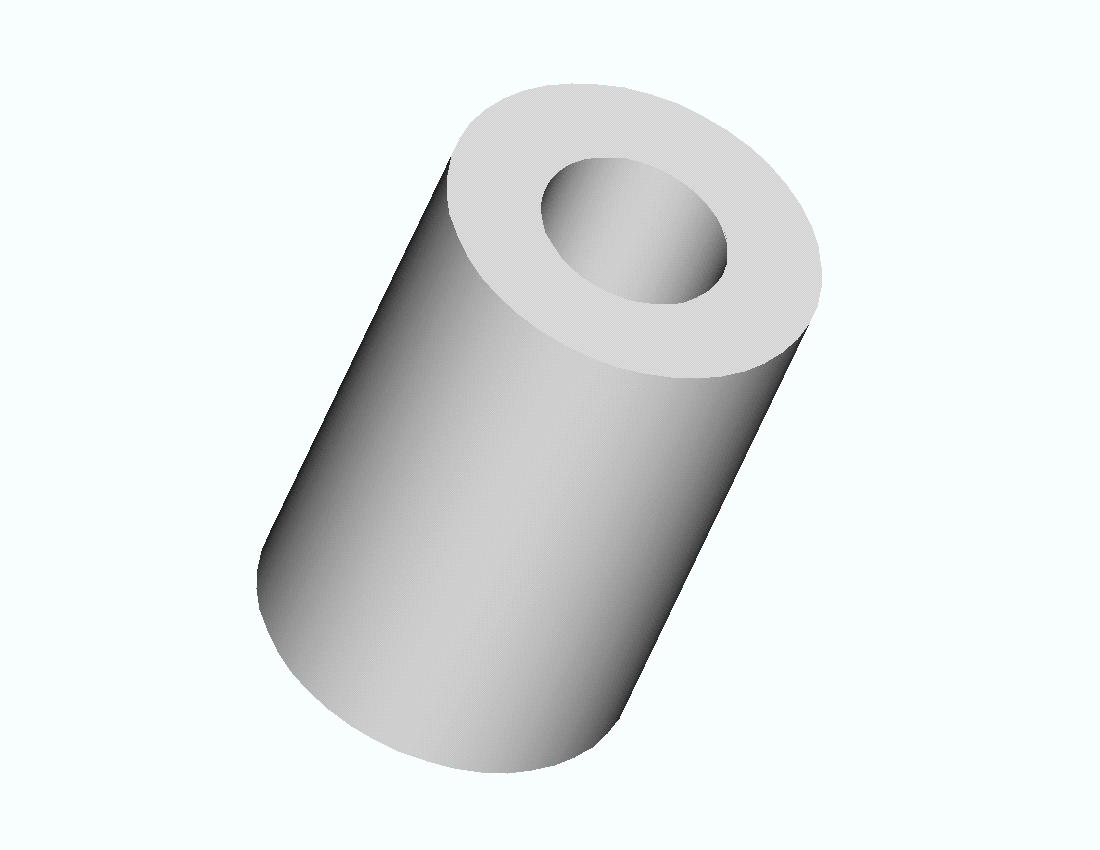
3D Solid Analysis - The problem described in the axisymmetric analysis example will now be solved using 3 dimensional modeling and analysis. (Of course, three-D modeling is not necessary for this problem, but it serves as an example for us, and we have an exact solution available for comparison.)
To restate the problem, consider the problem of finding the stresses in a thick open-ended cylinder with an internal pressure (such as a pipe discharging to the atmosphere). The steel cylinder below has an inner radius of 5 inches and an outer radius of 11 inches.

A cross section is shown below
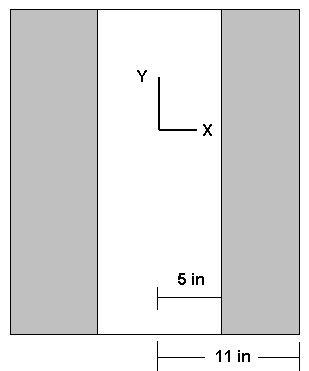
In both drawings the length is arbitrary and represents a segment of a long, open-ended cylinder. The Y axis is the axis of symmetry. The cylinder can be generated by revolving a rectangle 6 inches wide and of arbitrary height 360 degrees about the Y axis.
For the 3D analysis we will make use of symmetry and analyze one quadrant of the cylinder. If Y is the axis of revolution of the cylinder, both the X-Y and Y-Z planes are planes of symmetry.
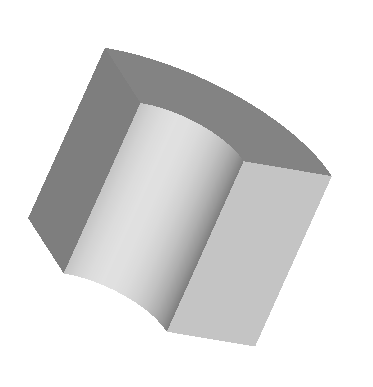
Since the height of the segment considered is arbitrary, we will use a segment 1 inch in height for the finite element model. The geometry is shown below.

The geometry is created using ANSYS geometry commands. (Alternatively the geometry could be created in a solid modeler such as Pro/ENGINEER, CATIA, SolidWorks, etc and imported into ANSYS for FEM analysis. See ANSYS Example 8.B)
The ANSYS solution to this problem is given next for an internal pressure of 1000 psi.
1. Start ANSYS
Use a tetrahedron element for the FEM modeling.
2. Preprocessor -> Element Type -> Add/Edit/Delete -> Add ->
select Tet 10node 92 -> OK -> CloseEnter material property data for steel.
3. Preprocessor -> Material Props -> Material Models . . . -> Structural -> Linear -> Elastic -> Isotropic ->Enter EX = 3.e7 and PRXY = 0.3 -> OK -> Close.
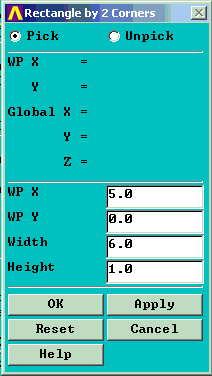
Create geometry for rectangle 1 inch by 6 inches starting 5 inches from Y axis. This rectangular area will be revolved 90 degrees about the Y axis to produce the desired volume.
4. Preprocessor -> Create -> Areas -> Rectangle ->By 2 Corners
Define two key points on the Y axis for revolving purposes.
5. In the gray box 'Pick a menu item or enter an ANSYS command' enter.
K, 10, 0.0, 0.0, 0.0 (Return) Defines key point number 10 at (0, 0, 0)
K, 11, 0.0, 5.0, 0.0 (Return) Defines key point number 11 at (0, 5, 0)
(Key points 1,2,3,4 are already used by ANSYS to define the rectangle, so we used numbers 10 and 11.)
Revolve the area
6. Preprocessor -> Operate -> Extrude -> Areas -> About Axis
Pick the area then pick the two key points on the Y axis.
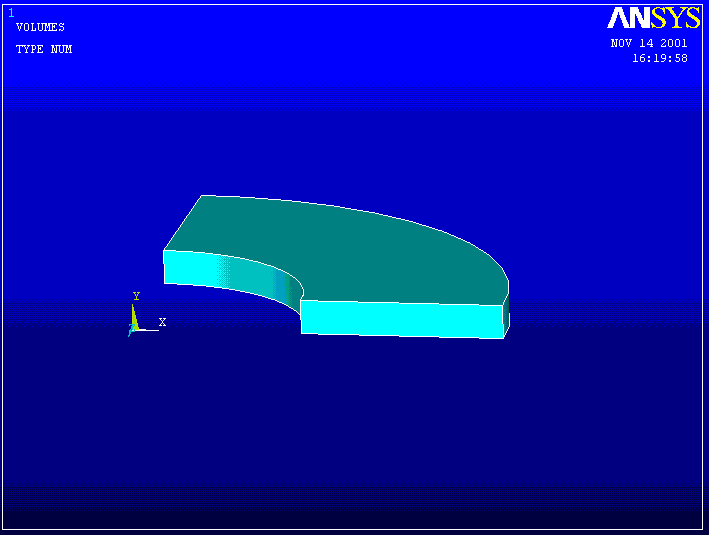
Now create a mesh of tetrahedral elements using the default settings.
5. Preprocessor -> Mesh -> Volumes -> Free (Pick the solid we just created.)
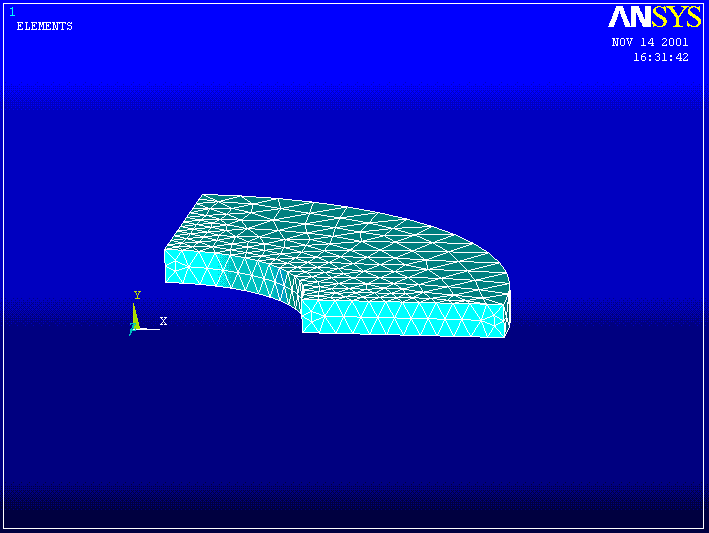
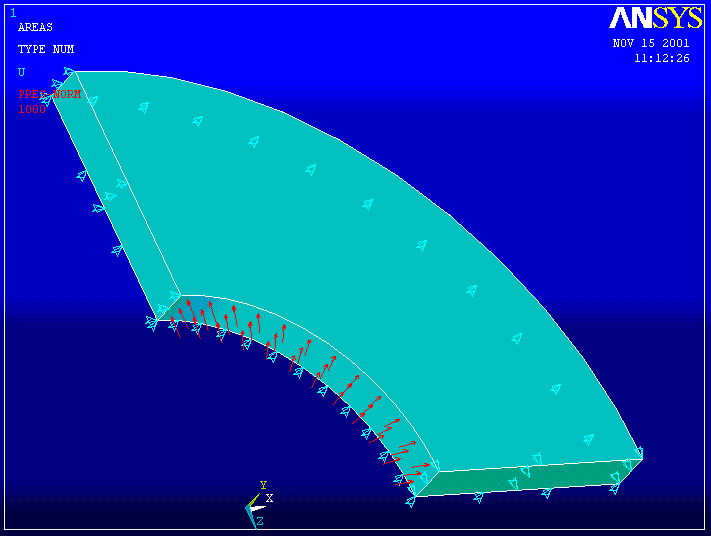
Define loads and boundary conditions. Apply an internal pressure of 1000 psi and displacement constraints that prevent points moving across planes of symmetry and also restrain rigid body movement in the Y direction.
6. Preprocessor -> Loads ->Apply ->Displacement -> On Areas Pick the radial surface parallel to the X-Y plane and set uz = 0 . Pick the radial surface parallel to the Z-Y plane and set ux = 0 . Pick the bottom (or top surface) and set uy = 0 . This last constraint simply prevents rigid body motion in the Y direction.
Note: Use Cntl + Right Mouse to rotate the solid so as to get a better view of the area you want to pick. It may also help to activate the area numbers and plot them. Then pick the area number of interest, eg,
PlotCntls -> Numbering . . . turn area numbers ON
Plot -> Areas
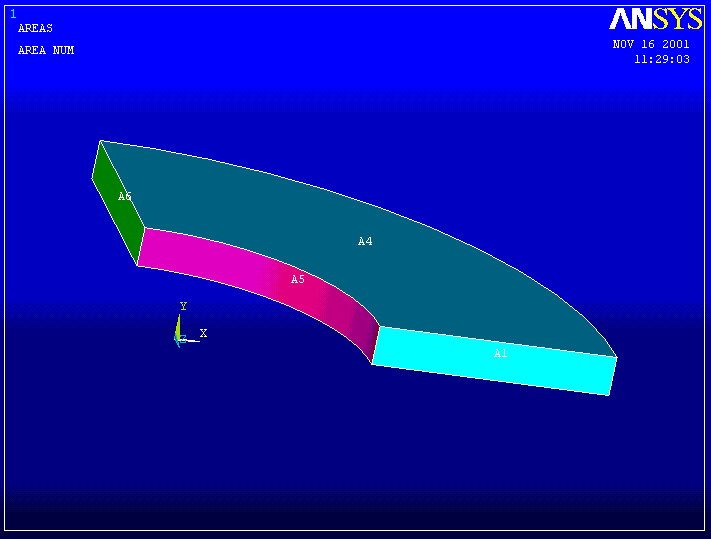
Preprocessor -> Loads ->Apply ->Pressure -> On Areas Pick the inner area of the cylinder). Enter a pressure of 1000
For large 3D problems it is often much faster to use the optional Preconditioned Conjugate Gradient method for solving the equations.
7. Solution -> Sol'n Control . . . -> Sol'n Options -> Pre-Condition CG -> OK
Solution -> Solve -> Current LS ->OK
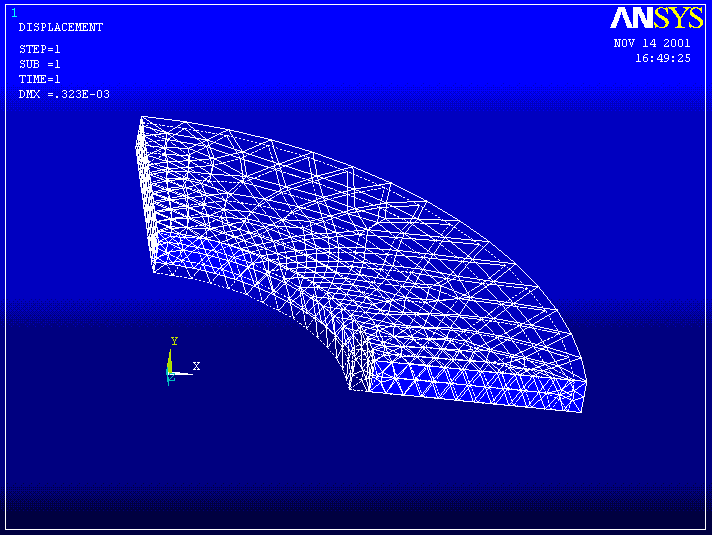
Check the deformed shape to see if it's reasonable. (The dotted line is the undeformed shape.)
8. General Post Processor -> Plot Results -> Deformed Shape . . . ->Def +undeformed -> OK
Examine the stresses ----------
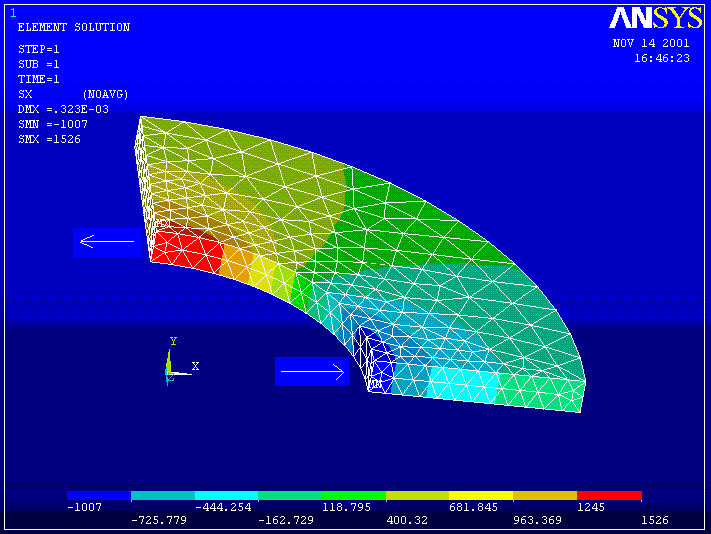
9. General Postprocessor -> Plot Results -> Element Solu . . . (Pick Sx).
SX --------------------------------------
The theoretical solution for this problem is:
At the inside of the cylinder SX = -1000 psi and SZ = 1520.8 psi
At the outside of the cylinder SX = 0 psi and SZ = 520.8psi.
The upper arrow shows Sx normal to the Z-Y plane which corresponds to the cylinder hoop stress. The scale at the bottom indicates a maximum value of 1526 psi which is close to the theoretical value of 1521.
The lower arrow shows Sx in a direction normal to the inner surface of the cylinder with a scale value of -1007, close to the internal pressure of 1000 psi.
Thus the ANSYS calculated results seem to agree pretty well with the theory. But we need to examine the stresses more closely at the boundaries.
Number the nodes and elements.
10. PlotCntls -> Numbering . . .-> Turn on Node & Element Numbers Zoom in on the inside wall of the cylinder.
INSIDE ------------------------------------
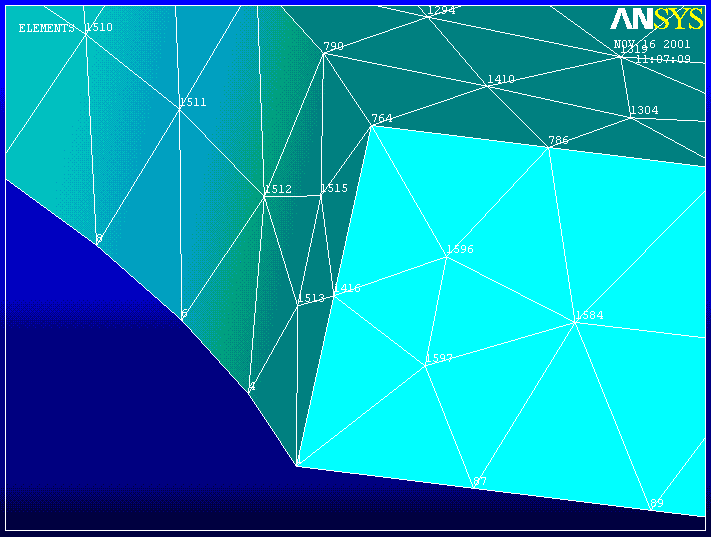
When the element stress solution contour plots are relatively smooth across element boundaries, as in this case, it indicates that the solution is reasonably accurate. Nodal Stress quantities can then be trusted as good representations of the solution.
List the stress results for node 764 .
11. List -> Results ->Nodal Solution . . . -> Stress -> Components -> OK.
THE FOLLOWING X,Y,Z VALUES ARE IN GLOBAL COORDINATES
NODE SX SY SZ SXY SYZ SXZ
764 -998.74 0.17087E-01 1521.7 0.98118E-01-0.50417 5.3997
Note that Sx = -998.74 is only 0.126 % different from the exact value of 1000, and Sz (hoop) = 1521.7 is only 0.06 % different from the theoretical value of 1520.8.
This problem can also be solved using brick elements. See the Mapped Meshes example for a guide to creating a mesh of 20 node brick elements for this cylindrical segment.
© 2001 Kent L. Lawrence